5 Fantastic HTML5 and CSS3 Snippets for Your Website
Here’s a shortlist of five simple yet cool HTML5 effects that can add life to your website! No images and JavaScript are necessary, as all of them are accomplished using only a combination of HTML5 and CSS3.
1. CSS3 Loading Animation
A very basic loading animation.

CSS code:
<style type='text/css'>
@-webkit-keyframes rotate {
from {
-webkit-transform: rotate(0deg);
}
to {
-webkit-transform: rotate(360deg);
}
}
#loading {
border: 1px solid #000;
border-right: 0;
border-bottom: 0;
-webkit-border-radius: 100px;
height: 100px;
width: 100px;
margin: 100px;
-webkit-transition: all 0.5s ease-in;
-webkit-animation-name: rotate;
-webkit-animation-duration: 1.0s;
-webkit-animation-iteration-count: infinite;
-webkit-animation-timing-function: linear;
}
</style>
|
HTML code:
<body>
<div id="loading"></div>
</body>
|
2. Twitter-inspired Glowing Input Box
The input box glows when you click on it. However, it only works on the latest browser versions (Firefox 4+, IE9, etc.).

CSS code:
<style>
input{
font-size:18px;
font-family: helvetica;
}
input {
outline:none;
transition: all 0.25s ease-in-out;
-webkit-transition: all 0.25s ease-in-out;
-moz-transition: all 0.25s ease-in-out;
border-radius:3px;
-webkit-border-radius:3px;
-moz-border-radius:3px;
border:1px solid rgba(0,0,0, 0.2);
color:gray;
background-color:#eee;
padding: 3px;
}
input:focus {
box-shadow: 0 0 15px green;
-webkit-box-shadow: 0 0 15px green;
-moz-box-shadow: 0 0 15px green;
border:1px solid green;
background-color:white;
}
body{
background-color: #FFF;
color:gray;
font-family:Arial;
}
</style>
|
HTML code:
<div>
Username <input type="text" name="username" placeholder="username">
</div>
|
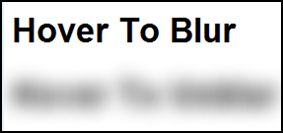
3. Blur/Unblur Text Effect On Hover
This uses CSS3 transitions and text shadow with transparent color that creates a blurred text effect.

CSS code:
<style>
.hover_blur{
font-size:35px;
font-family: helvetica;
transition: all 0.25s ease-in-out;
-moz-transition: all 0.25s ease-in-out;
-webkit-transition: all 0.25s ease-in-out;
color:black;
}
.hover_blur:hover{
color:transparent;
text-shadow: black 0 0 100px;
}
.hover_unblur{
font-size:35px;
font-family: helvetica;
transition: all 0.25s ease-in-out;
-moz-transition: all 0.25s ease-in-out;
-webkit-transition: all 0.25s ease-in-out;
text-shadow: black 0 0 30px;
color:transparent;
}
.hover_unblur:hover{
color:black;
text-shadow: black 0 0 0px;
}
body{
background-color: #FFF;
color:gray;
font-family:Arial;
}
</style>
|
HTML code:
<h1>Hover To Blur</h1>
<h1>Hover To Unblur</h1>
|
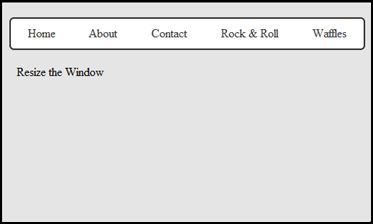
4. Fluid Horizontal Navigation (CSS3 Flexbox)
This is a simple yet fluid horizontal navigation menu that uses the CSS3 Flexible Box model.

CSS code:
<style type="text/css">
.container{
display:block;
float:left;
min-width:500px;
resize:both;
overflow:auto;
height:300px;
border:1px solid black;
background:rgba(0,0,0,.1);
}
nav{
display: -webkit-box;
display: -moz-box;
display: box;
-webkit-box-orient:horizontal;
-moz-box-orient:horizontal;
box-orient:horizontal;
border:2px solid #333;
-webkit-border-radius:6px;
-moz-border-radius:6px;
-o-border-radius:6px;
border-radius:6px;
width: 95%;
margin:20px auto;
background:white;
}
nav a{
display:block;
color:#333;
padding:10px;
-webkit-box-flex:1;
-moz-box-flex:1;
box-flex:1;
text-align:center;
text-decoration:none;
-webkit-transition:all .4s linear;
-moz-transition:all .4s linear;
-o-transition:all .4s linear;
transition:all .4s linear;
}
a:hover {
background-color: rgba(0,0,0,.2);
}
a:active {
background-color: #333;
-webkit-box-shadow: inset 0 2px 8px hsla( 0, 0%, 0%, 0.6 );
-moz-box-shadow: inset 0 2px 8px hsla( 0, 0%, 0%, 0.6 );
-o-box-shadow: inset 0 2px 8px hsla( 0, 0%, 0%, 0.6 );
box-shadow: inset 0 2px 8px hsla( 0, 0%, 0%, 0.6 );
color:white;
}
p{
margin:20px;
}
</style>
|
HTML code:
<div>
<nav>
<a href="#">Home</a>
<a href="#">About</a>
<a href="#">Contact</a>
<a href="#">Rock & Roll</a>
<a href="#">Waffles</a>
</nav>
<p>Resize the Window</p>
</div>
|
5. Animated Button
Originally created by Dan Cederholm, this button’s extra-smooth animation is way better than your typical image swap effect!

CSS code:
<style type="text/css"> body {
padding: 2em 5em; font-family: "Helvetica Neue", Helvetica, Arial, sans-serif; font-size: 250%; background: #eee; } a:link, a:visited {
text-decoration: none; color: #fff; border: none; } a img {
border: none; } div.mod {
margin: 0 0 30px 0; padding: 80px; text-align: center; background: #fff; -webkit-border-radius: 10px; -moz-border-radius: 10px; border-radius: 10px; -webkit-box-shadow: 0 0 3px rgba(0, 0, 0, .1); -moz-box-shadow: 0 0 3px rgba(0, 0, 0, .1); box-shadow: 0 0 3px rgba(0, 0, 0, .1); } p.notes {
margin: 0 0 10px 0; font-size: 13px; line-height: 1.4; color: #999; text-align: center; } p.notes a {
font-weight: bold; color: #777; border-bottom: 1px solid #ccc; -webkit-transition: color .2s ease; -moz-transition: color .2s ease; -o-transition: color .2s ease; transition: color .2s ease; } p.notes a:hover {
color: #555; } p.notes span {
margin: 0 4px; color: #ccc; } #stamp {
display: block; margin: 20px 0; border: none; -webkit-transition: opacity .2s ease; -moz-transition: opacity .2s ease; -o-transition: opacity .2s ease; transition: opacity .2s ease; } #stamp:hover {
opacity: .7; } /* button styles */ .btn {
display: inline-block; -webkit-border-radius: 8px; -moz-border-radius: 8px; border-radius: 8px; -webkit-box-shadow: 0 8px 0 #1a74a1, 0 15px 20px rgba(0, 0, 0, .35); -moz-box-shadow: 0 8px 0 #1a74a1, 0 15px 20px rgba(0, 0, 0, .35); box-shadow: 0 8px 0 #1a74a1, 0 15px 20px rgba(0, 0, 0, .35); -webkit-transition: -webkit-box-shadow .2s ease-in-out; -moz-transition: -moz-box-shadow .2s ease-in-out; -o-transition: -o-box-shadow .2s ease-in-out; transition: box-shadow .2s ease-in-out; } .btn span {
display: inline-block; padding: 10px 20px; font-family: "cooper-black-std-1", "cooper-black-std-2", Helvetica, Arial, sans-serif; line-height: 1; text-shadow: 0 -1px 1px rgba(19, 65, 88, .8); background: #3194c6; background: -webkit-gradient(linear, 0% 0%, 0% 100%, from(#3194c6), to(#5bacd6)); background: -moz-linear-gradient(#3194c6, #5bacd6); -webkit-border-radius: 8px; -moz-border-radius: 8px; border-radius: 8px; -webkit-box-shadow: inset 0 -1px 1px rgba(255, 255, 255, .15); -moz-box-shadow: inset 0 -1px 1px rgba(255, 255, 255, .15); box-shadow: inset 0 -1px 1px rgba(255, 255, 255, .15); -webkit-transition: -webkit-transform .2s ease-in-out; -moz-transition: -moz-transform .2s ease-in-out; -o-transition: -o-transform .2s ease-in-out; transition: transform .2s ease-in-out; } .btn:active {
-webkit-box-shadow: 0 8px 0 #1a74a1, 0 12px 10px rgba(0, 0, 0, .3); -moz-box-shadow: 0 8px 0 #1a74a1, 0 12px 10px rgba(0, 0, 0, .3); box-shadow: 0 8px 0 #1a74a1, 0 12px 10px rgba(0, 0, 0, .3); -webkit-transition: -webkit-transform 0s ease-in-out; -moz-transition: -moz-transform 0s ease-in-out; -o-transition: -o-transform 0s ease-in-out; transition: transform 0s ease-in-out; } .btn:active span {
-webkit-transform: translate(0, 4px); -moz-transform: translate(0, 4px); -o-transform: translate(0, 4px); transform: translate(0, 4px); -webkit-transition: -webkit-transform 0s ease-in-out; -moz-transition: -moz-transform 0s ease-in-out; -o-transition: -o-transform 0s ease-in-out; transition: transform 0s ease-in-out; } </style> |
HTML code:
<div>
<a href="#" ><span>Press this!</span></a>
</div>
|


No comments
Tweet-Parade (no.8 FEB 2012) | gonzoblog.nl
02.25.2012
[...] 5 Fantastic HTML5 and CSS3 Snippets for Your Website - Here’s a shortlist of five simple yet cool HTML5 effects that can add life to your website! No images and JavaScript are necessary, as all of them are accomplished using only a combination of HTML5 and CSS3. [...]
There are no trackbacks to display at this time.