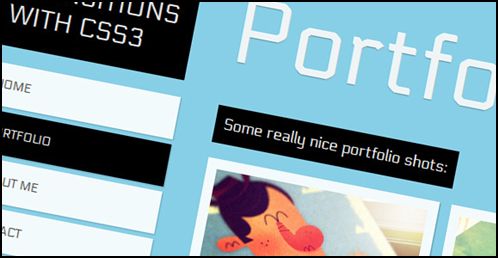
How to Create Page Transitions with CSS3
Sergio Camalich displays a nice tutorial on how you can have your own site having page transitions effect. The technique he used here are css transitions and :target property.
Markup.
HTML
<!-- Home -->
<div id="home" class="content">
<h2>Home</h2>
<p>Some content</p>
<!-- ... -->
</div>
<!-- /Home -->
<!-- Portfolio -->
<div id="portfolio" class="panel">
<div class="content">
<h2>Portfolio</h2>
<p>Some content</p>
<!-- ... -->
</div>
</div>
<!-- /Portfolio -->
<!-- About -->
<div id="about" class="panel">
<div class="content">
<h2>About</h2>
<p>Some content</p>
<!-- ... -->
</div>
</div>
<!-- /About -->
<!-- Contact -->
<div id="contact" class="panel">
<div class="content">
<h2>Contact</h2>
<p>Some content</p>
<!-- ... -->
</div>
</div>
<!-- /Contact -->
Main heading and navigation at the header:
<!-- Header with Navigation -->
<div id="header">
<h1>Page Transitions with CSS3</h1>
<ul id="navigation">
<li><a id="link-home" href="#home">Home</a></li>
<li><a id="link-portfolio" href="#portfolio">Portfolio</a></li>
<li><a id="link-about" href="#about">About Me</a></li>
<li><a id="link-contact" href="#contact">Contact</a></li>
</ul>
</div>
CSS
#header{
position: absolute;
z-index: 2000;
width: 235px;
top: 50px;
}
#header h1{
font-size: 30px;
font-weight: 400;
text-transform: uppercase;
color: rgba(255,255,255,0.9);
text-shadow: 0px 1px 1px rgba(0,0,0,0.3);
padding: 20px;
background: #000;
}
#navigation {
margin-top: 20px;
width: 235px;
display:block;
list-style:none;
z-index:3;
}
#navigation a{
color: #444;
display: block;
background: #fff;
background: rgba(255,255,255,0.9);
line-height: 50px;
padding: 0px 20px;
text-transform: uppercase;
margin-bottom: 6px;
box-shadow: 1px 1px 2px rgba(0,0,0,0.2);
font-size: 14px;
}
#navigation a:hover {
background: #ddd;
}
Using negative margin in normal class and no margin at all in :target pseudo-class.
.panel{
min-width: 100%;
height: 98%;
overflow-y: auto;
overflow-x: hidden;
margin-top: -150%;
position: absolute;
background: #000;
box-shadow: 0px 4px 7px rgba(0,0,0,0.6);
z-index: 2;
-webkit-transition: all .8s ease-in-out;
-moz-transition: all .8s ease-in-out;
-o-transition: all .8s ease-in-out;
transition: all .8s ease-in-out;
}
.panel:target{
margin-top: 0%;
background-color: #ffcb00;
}
Styling the content class
.content{
right: 40px;
left: 280px;
top: 0px;
position: absolute;
padding-bottom: 30px;
}
.content h2{
font-size: 110px;
padding: 10px 0px 20px 0px;
margin-top: 52px;
color: #fff;
color: rgba(255,255,255,0.9);
text-shadow: 0px 1px 1px rgba(0,0,0,0.3);
}
.content p{
font-size: 18px;
padding: 10px;
line-height: 24px;
color: #fff;
display: inline-block;
background: black;
padding: 10px;
margin: 3px 0px;
}
Using the :target pseudo-class with the general sibling selector
#home:target ~ #header #navigation #link-home,
#portfolio:target ~ #header #navigation #link-portfolio,
#about:target ~ #header #navigation #link-about,
#contact:target ~ #header #navigation #link-contact{
background: #000;
color: #fff;
}
View the DEMO and get the DOWNLOAD.
Check out Camalich’s full tutorial by clicking on the image.


1 Comment
syahzul
07.06.2012
the tutorial is good but the post formatting is bad.
There are no trackbacks to display at this time.