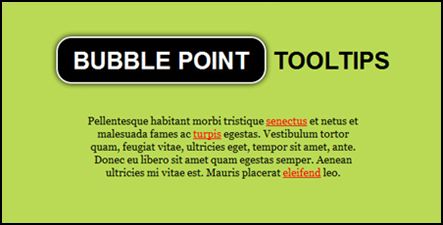
Creating a Bubble Point Tooltips with CSS3 and jQuery
Chris Coyier shares a tutorial that creates a bubble point tooltips with CSS3 and jQuery. Note that its demo will not work on Opera.
To start with, here’s the HTML:
<a href="#" title="Hi, I'm a tooltip thingy.">link</a>
Givje the link a title attribute.
jQuery:
$("article a[title]").tooltips();
The plugin will do the following: loop through each link; make div.tooltip for each, text inside that matches it links the title attribute; remove links title attribute; when link is hovered on, it positions the tooltip accordingly and slides it to be visible; when link is hovered off, it slides the link out of visibility.
Here’s the massive code dump:
// IIFE to ensure safe use of $
(function( $ ) {
  // Create plugin
  $.fn.tooltips = function(el) {
    var $tooltip,
      $body = $('body'),
      $el;
    // Ensure chaining works
    return this.each(function(i, el) {
      $el = $(el).attr("data-tooltip", i);
      // Make DIV and append to page
      var $tooltip = $('<div data-tooltip="' + i + '">' + $el.attr('title') + '<div></div></div>').appendTo("body");
      // Position right away, so first appearance is smooth
      var linkPosition = $el.position();
      $tooltip.css({
        top: linkPosition.top - $tooltip.outerHeight() - 13,
        left: linkPosition.left - ($tooltip.width()/2)
      });
      $el
      // Get rid of yellow box popup
      .removeAttr("title")
      // Mouseenter
      .hover(function() {
        $el = $(this);
        $tooltip = $('div[data-tooltip=' + $el.data('tooltip') + ']');
        // Reposition tooltip, in case of page movement e.g. screen resize
        var linkPosition = $el.position();
        $tooltip.css({
          top: linkPosition.top - $tooltip.outerHeight() - 13,
          left: linkPosition.left - ($tooltip.width()/2)
        });
        // Adding class handles animation through CSS
        $tooltip.addClass("active");
        // Mouseleave
      }, function() {
        $el = $(this);
        // Temporary class for same-direction fadeout
        $tooltip = $('div[data-tooltip=' + $el.data('tooltip') + ']').addClass("out");
        // Remove all classes
        setTimeout(function() {
          $tooltip.removeClass("active").removeClass("out");
          }, 300);
        });
      });
    }
})(jQuery);
CSS
.tooltip, .arrow:after {
  background: black;
  border: 2px solid white;
}
.tooltip {
  pointer-events: none;
  opacity: 0;
  display: inline-block;
  position: absolute;
  padding: 10px 20px;
  color: white;
  border-radius: 20px;
  margin-top: 20px;
  text-align: center;
  font: bold 14px "Helvetica Neue", Sans-Serif;
  font-stretch: condensed;
  text-decoration: none;
  text-transform: uppercase;
  box-shadow: 0 0 7px black;
}
.arrow {
  width: 70px;
  height: 16px;
  overflow: hidden;
  position: absolute;
  left: 50%;
  margin-left: -35px;
  bottom: -16px;
}
.arrow:after {
  content: "";
  position: absolute;
  left: 20px;
  top: -20px;
  width: 25px;
  height: 25px;
  -webkit-box-shadow: 6px 5px 9px -9px black,
                      5px 6px 9px -9px black;
  -moz-box-shadow: 6px 5px 9px -9px black,
                   5px 6px 9px -9px black;
  box-shadow: 6px 5px 9px -9px black,
              5px 6px 9px -9px black;
  -webkit-transform: rotate(45deg);
  -moz-transform:    rotate(45deg);
  -ms-transform:     rotate(45deg);
  -o-transform:      rotate(45deg);
}
.tooltip.active {
  opacity: 1;
  margin-top: 5px;
  -webkit-transition: all 0.2s ease;
  -moz-transition:    all 0.2s ease;
  -ms-transition:     all 0.2s ease;
  -o-transition:      all 0.2s ease;
}
.tooltip.out {
  opacity: 0;
  margin-top: -20px;
}
Check out full tutorial by clicking on the image.


